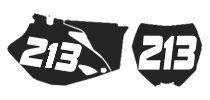
AMR Graphics are not full wraps. They are individual pieces and you will see parts of your plastics compliment your graphics.
Installation Guide
Notes
- If you would like to polish up the graphics, AMR recommends using pledge to spray and wipe down your graphics.
- You don't want to rush and take the chance of having bubbles in your graphics or worse, putting them on crooked.
Installation Steps
- Completely wash your vehicle.
- Thoroughly scrub and clean your tank and plastics, remove all old adhesive, dirt, lint, oil, etc... Rinse with plain water and dry with a lint-free cloth. Remove all soap residue.
- After it's clean, rub it down with alcohol.
- Before removing the backing, hold the graphics up to your vehicle to get a general idea of how the graphics should look.
- To get a visual of how it will look on your vehicle, make sure to line the pieces by the design to the artwork. It is normal to have gaps between the pieces. This will also help to make sure you're putting them on the correct plastics.
- The first piece to start with is the nose. This will make sure all the pieces line up.
- Wrap a soft, lint-free cloth around your squeegee.
- Spray the plastic with soapy water. Coat the entire outside of the plastics.
- Remove the backing from the graphic, and as you peel, spray a light mist of water to both sides of the graphics.
- Lightly set the graphic onto the plastic section making sure all holes are lined up properly. If both sides of the sicker are wet, it will help it to slide around to make sure it's properly placed.
- Once you are satisfied with the placing of the graphics. Start at one end of the graphic and squeegee the water out to the other end and make sure there are no water or bubbles. It's best to work your way from the high point and down-outwards.
- If you end up with some creases and bubbles, you can use a little heat from the heat gun to work them out.
- Once you get all of the water and air bubbles out, you can safely move to the next panel.
- Repeat with other graphics.
- That last step is to run the heat dryer over all the plastics and rub with the toweled squeegee to help the graphics stick to the plastic.
- Let your vehicle dry for a minimum of 24 hours before riding. We recommend 48-72 hours for optimal results.


